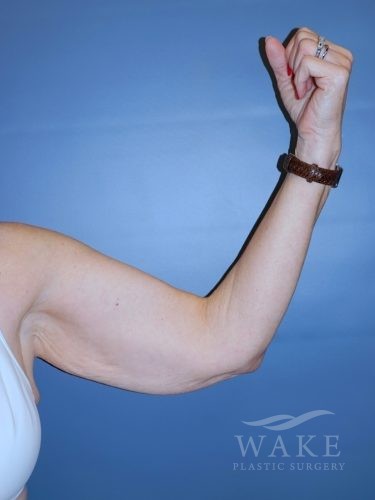
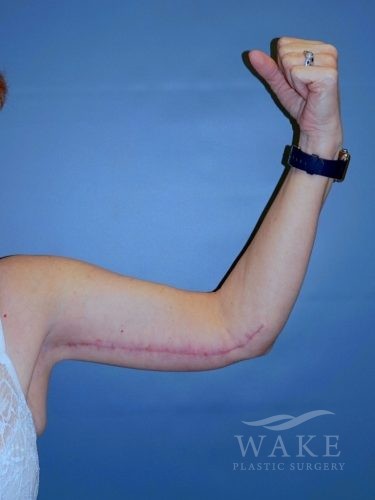
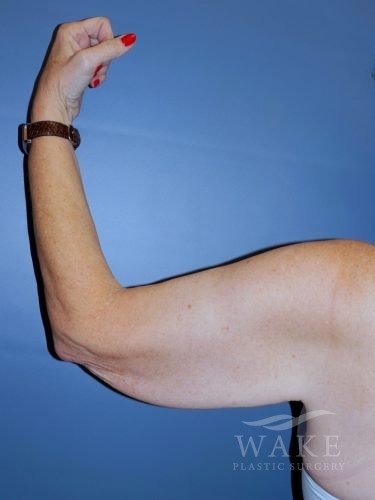
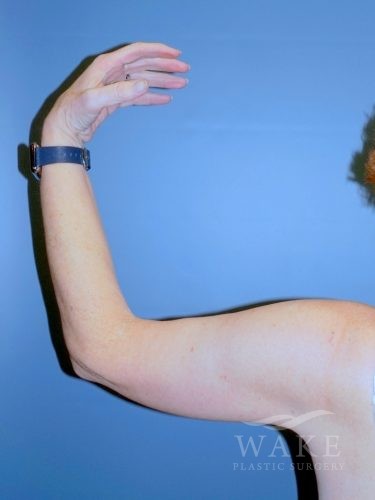
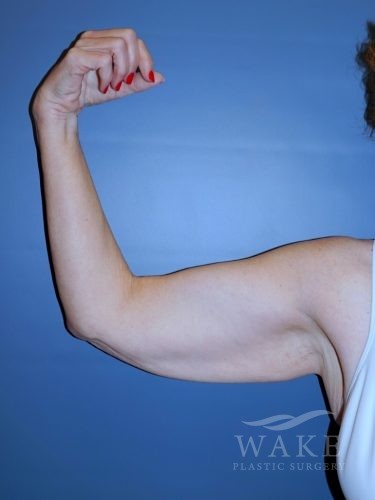
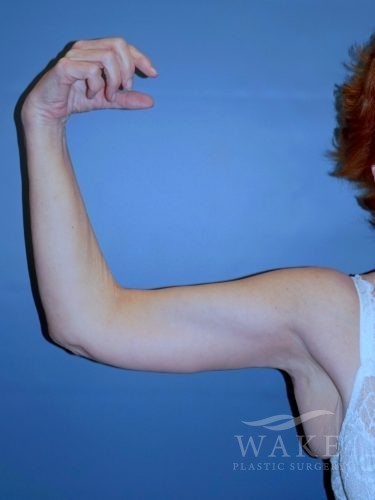
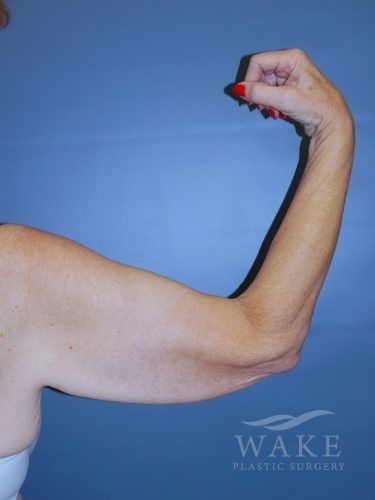
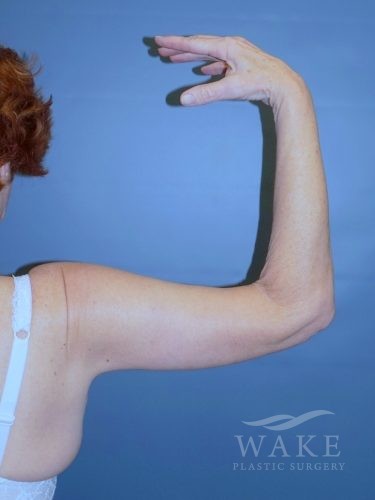


Arm Lift Patient 10
Description:
This patient lost over 100 lbs after gastric bypass surgery. She had a tummy tuck surgery 2 weeks ago and was recovering quite well. She was able to complete her brachioplasty procedure and somewhat combine her recovery time for both procedures. She also decided to use a medial scar on one arm and a posterior scar on the other. This was an interesting choice and she is an example of the benefits of both incision placements.
Age: 57
Height: 5'4"
Weight: 127 lbs
Months Post Op: 3